It’s often good to have some text that overlays the slider that welcomes visitors and perhaps provides additional information. This is done by adding a Static Overlay slide to your slider.
11.8.1 A note about Fonts
Part of making your slider ‘special’ is to choose fonts that are classy and professional. Smart Slider 3 comes pre-equipped with the option to use Google Fonts where you can choose from dozens of elegant and robust font faces for your heading and text on your overlays.
The following is advisory only and is not something you would do on a day to day basis, if at all.
To see what fonts are available at the right side of the Header bar you can reach the Global settings:

Click Settings
Most of the Global Settings are fine as default. The only possible option that you might want to change is under the Fonts page.
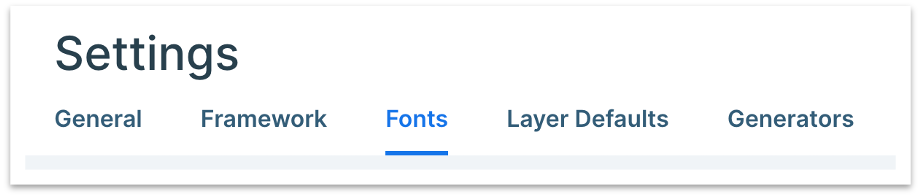
On this page you can choose the font you want to be the default for Headings and Text when they are added to your Overlay Slider. If you know the name of the font to use for these, delete the content in the Default Family field and type in the name of your chosen font. Click Save when done. You might like to ask us for support on this though!

11.8.2 Adding a Static Overlay Slide
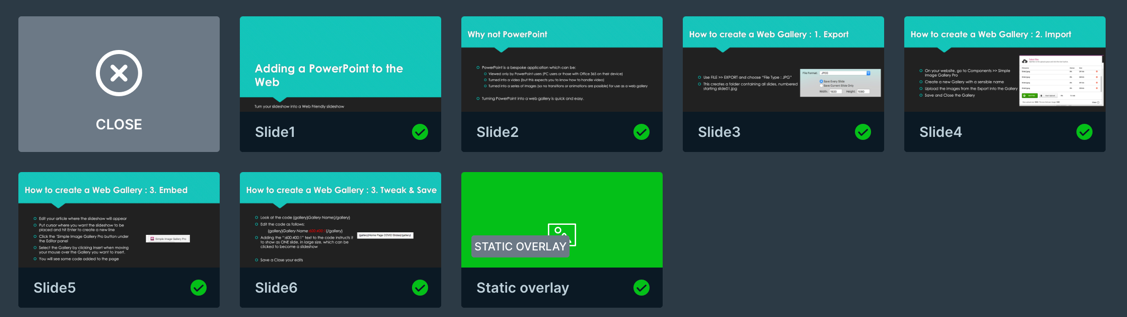
Earlier we saw that when you have a slider with slides already in place that you can add more slides to it by clicking the “Add Slide” button to see a choice of slide types:
The Static Overlay option creates a slide that is transparent that will sit in front of all of the slides in the slider show like an acetate in traditional slideshow. Static Overlays and can hold text, images, buttons etc. that are static while the images transition below.
When you click the Static Overlay button, a new Green slide is added to your slider:
You can now edit the static overlay slide to include text and other content. For ease of supporting you in this guide we will detail how to add a Welcome section and a sub-section for a message under the welcome panel.
11.8.3 Adding text to the Static Overlay Slide
Start by clicking Edit when you move your mouse over the green Static Overlay slide. The Slide opens up in edit mode showing the first slide in the array on show behind it (purely for reference and alignment). You can’t edit the underlying slide!
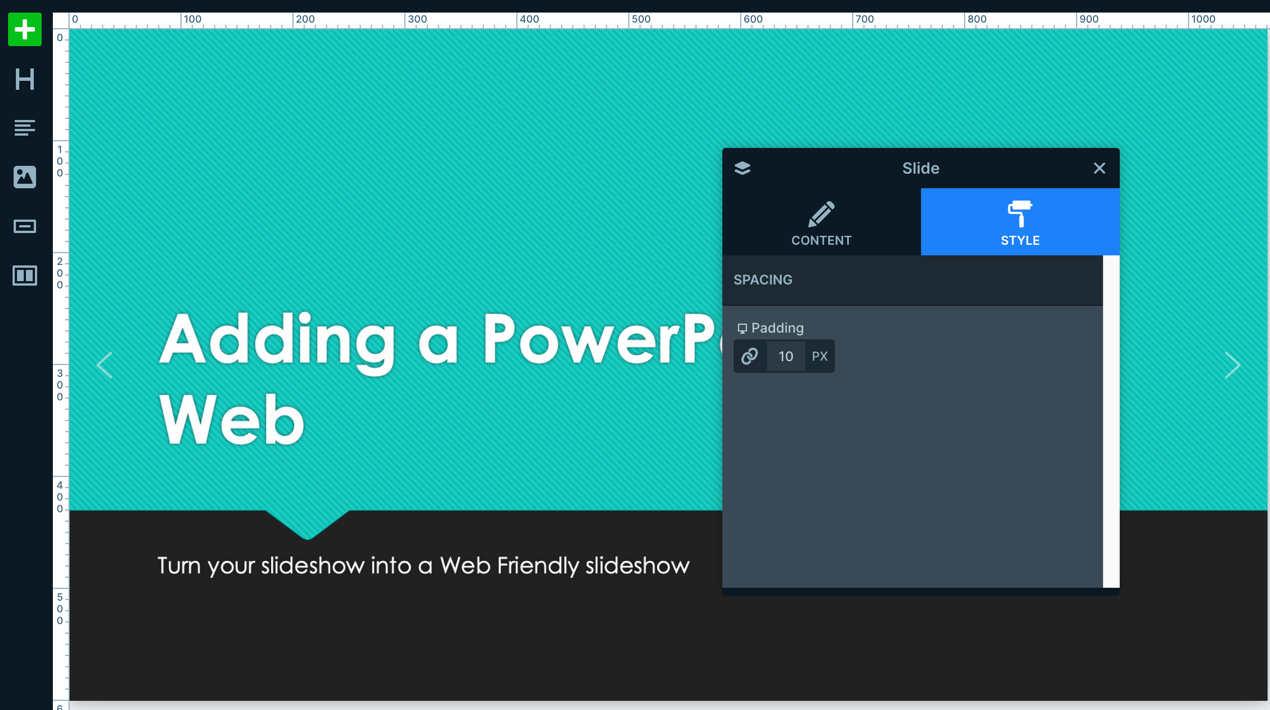
The dark slide panel shown can be dragged out of the way as you work so that it doesn’t get in your way as you make changes to the slide.
11.8.4 Slide Overlay Tools
Down the left of the slide are a set of icons:
[+] : We call this “Advanced Tools” as this allows you to add a new transparent layer with any form of content or to apply a theme to your overlay in case you want to have special things happening in the slide like movement or special animation of content on a layer. The themes are predefined concepts of predefined images and text that you can use and adapt to make your own slides more polished.
We can’t easily cover all the possible themes and choices available under the [+] button so we will leave you to enjoy experimenting with these on a text slider that you can make in your own time but below we list them for you!
11.8.5 Advanced Tools
As mentioned, the large number of possible tools you can use is significant but we list them below.
Click [+] and you will see a number of choices:
Basic Tools
- Row
- Heading
- Text
- Image
- Button
- Icon
Special Tools
- Image Box
- Animated Heading
- Highlighted Heading
- Caption
- Transition
- List
- Progress Bar
- Circle Counter
- Counter
- Countdown
- Before/After
Media Tools
- Vimeo
- YouTube
- Video
- Audio
Advanced Tools
- Image Area
- Area
- Iframe
- Input
- HTML