This page includes one or more support videos to assist you in this topic!
Remember, menus are nothing more than a set of hyperlinks often to web pages of your website. So, you can understand that if you try to create a web link to something which doesn't exist then you are going to find a problem and an error will be reported. Therefore ensure that all of your articles and other content are ready for use before creating the menu items for them.
16.2.1 Create a menu item to an article that you have created
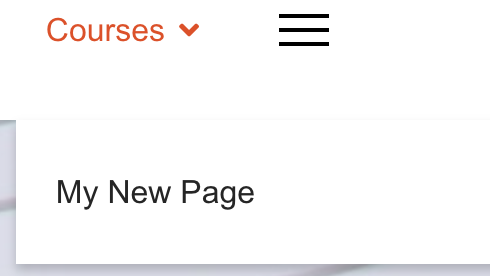
Let's use our earlier menu that we showed and use it to add a new menu item to an article that we have created. Here is the menu before we do any work to it:

Firstly, we need to consider which of the 5 areas seen in our menu will be the “Parent” for this new menu item; in other words, if we wish to show a link to an article underneath “Courses”, then “Courses” will be the parent item and the new link will be a child item:
Courses (Parent or Level 1 item)
- Link to New Page (Child or Level 2 item)
All items in menus are structured this way such that items at the top are always parent items (also known as level 1) and items underneath the parent are always known as child items (also known as level 2).
Because we have decided to add our new menu item underneath Courses, it helps us now to create it within the website control panel. Here are the steps involved:
- In the control panel, click Menus > Main Menu [it will ALWAYS have a small house icon next to it to represent the HOME menu].
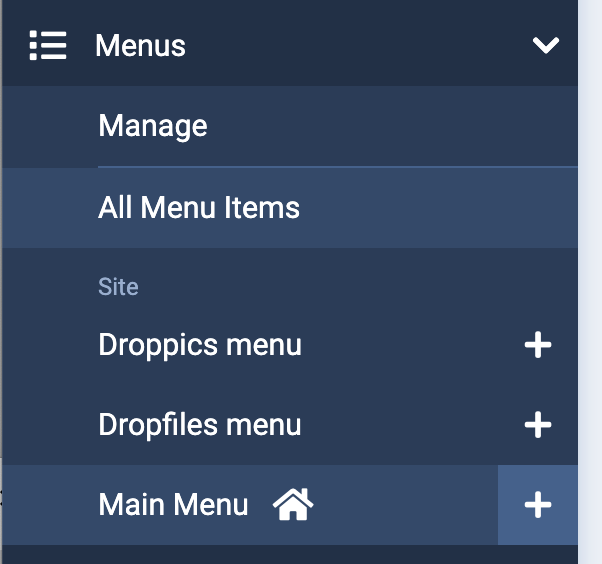
- You will now be presented with the Main Menu items list.
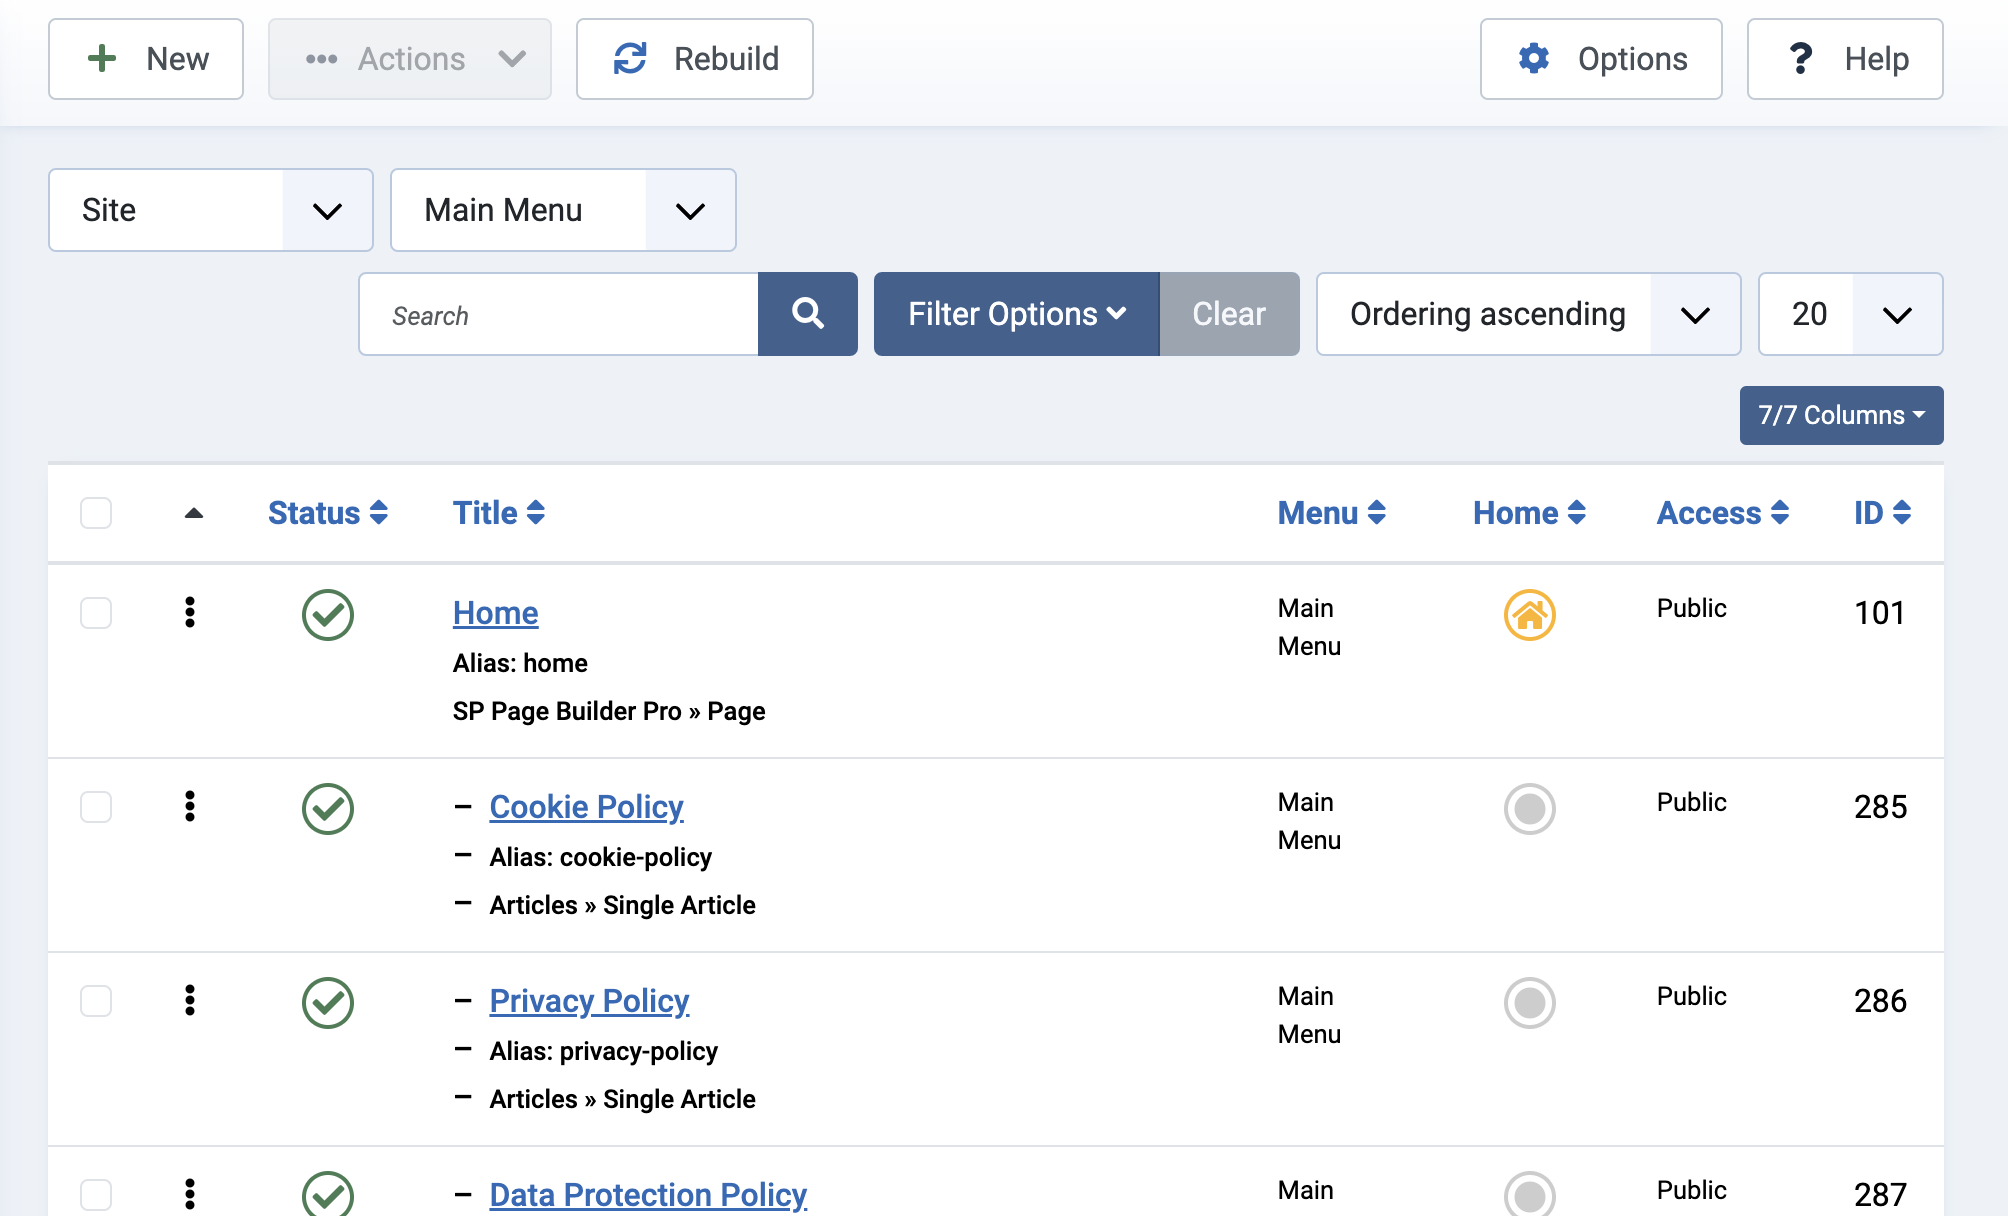
- Click on the New button at the top of the page.
- A new item page form is presented.
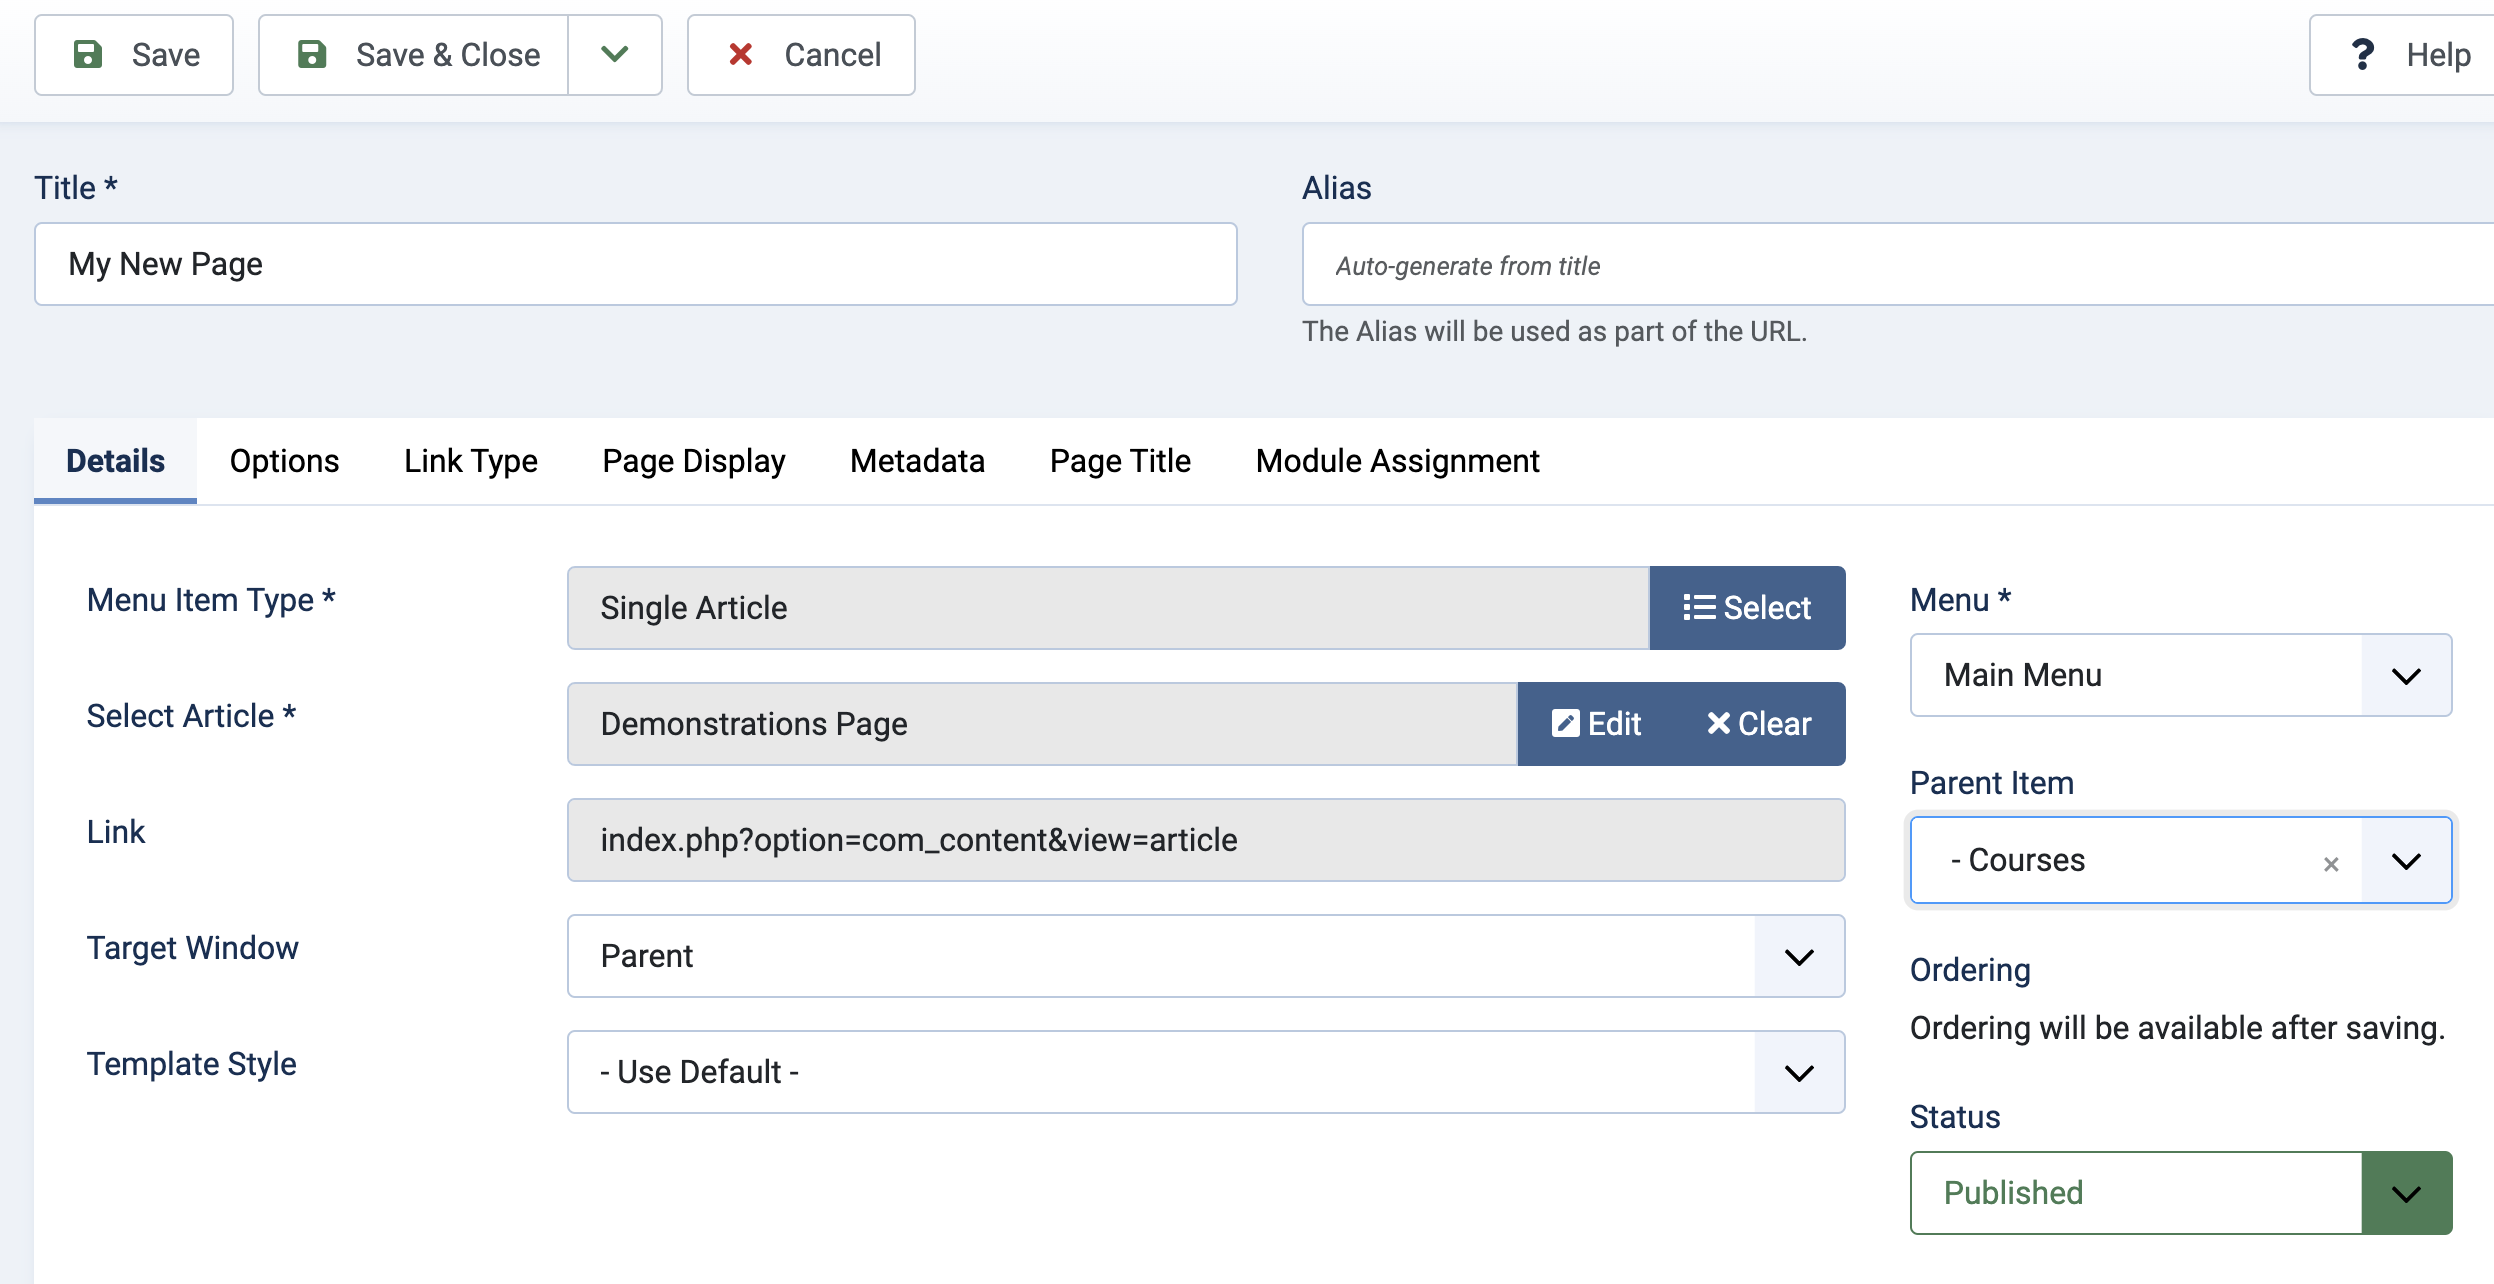
- In the Title field, type in the words that you wish to appear in the menu to represent the page you are going to reach. In our example, we will have a menu item which reads “My New Page”.

- Now, you'll see a form area titled “Menu Item Type”. To the right of this field is a blue button marked Select.
![]()
- Click this button.
- A popup window appears showing you a number of different types of menu that you can add. Please don't be daunted by the number available! As a rule of thumb, you will only normally use one or two of them!
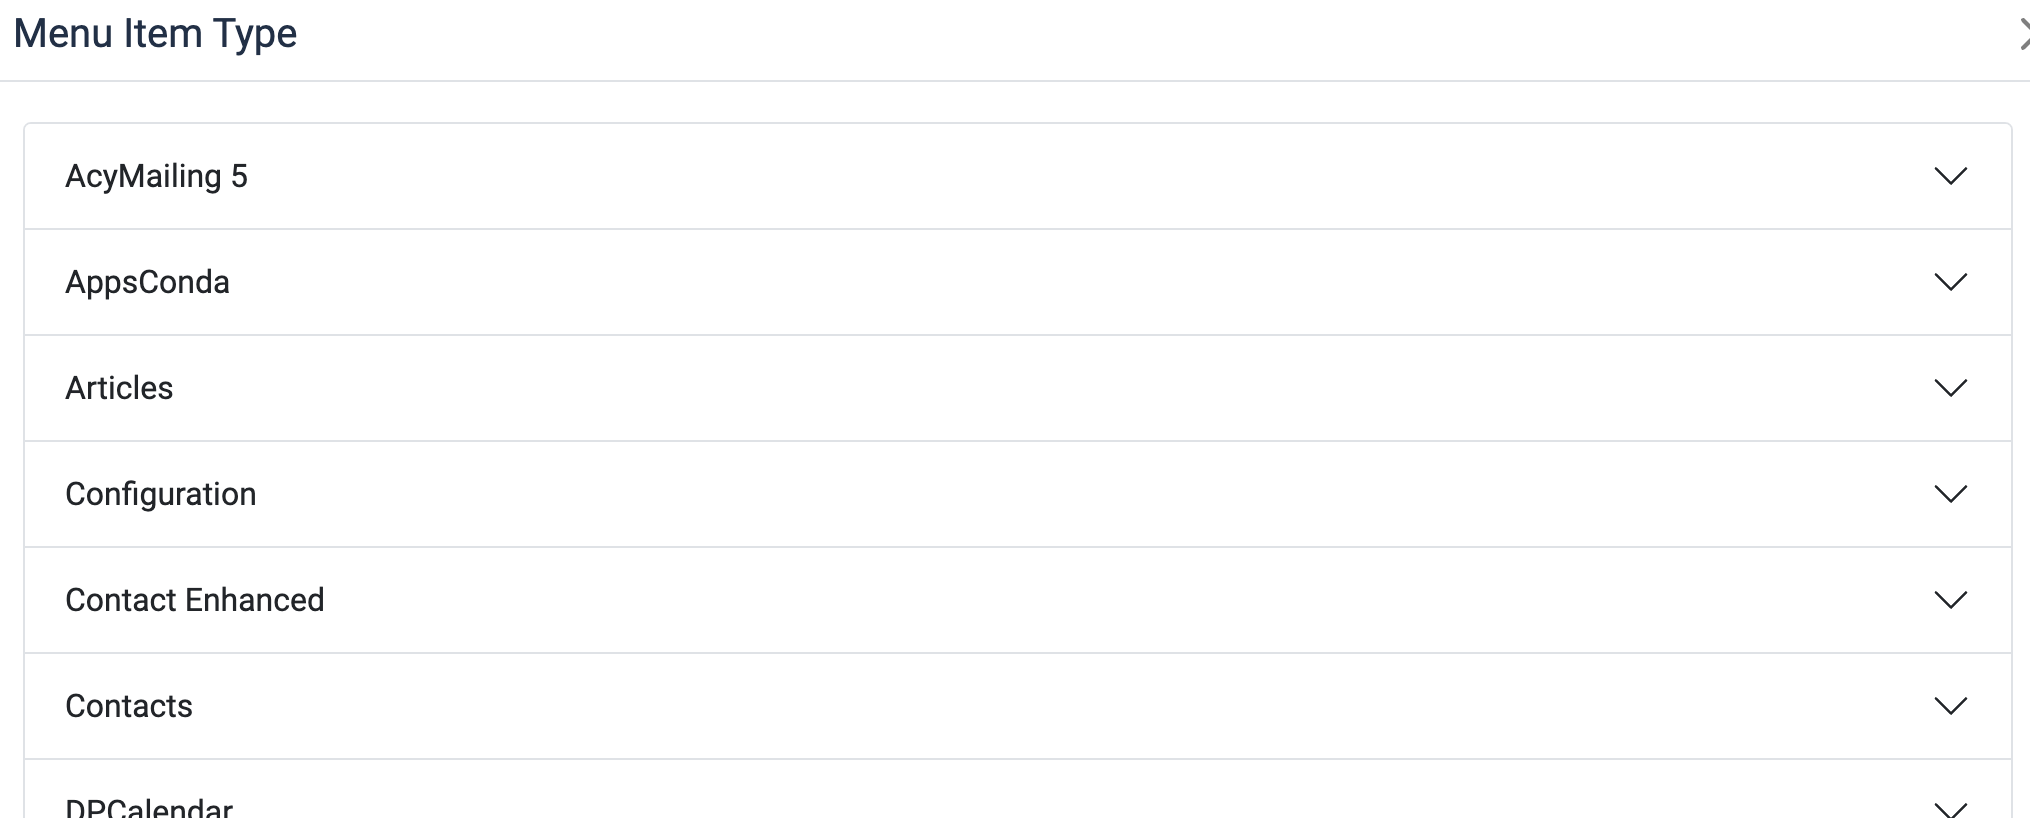
- Click on Articles, and the item will expand to show different forms of article that you might use for your page display.

- The two most common options which are used are:
- Category Blog
- Single Article
- We only want to display one article when the menu item is clicked, then we should choose Single Article.
- The popup will disappear and return you to the new item form.
- Now, you'll see a new field has been displayed for you select which Article to show when the item is clicked.
![]()
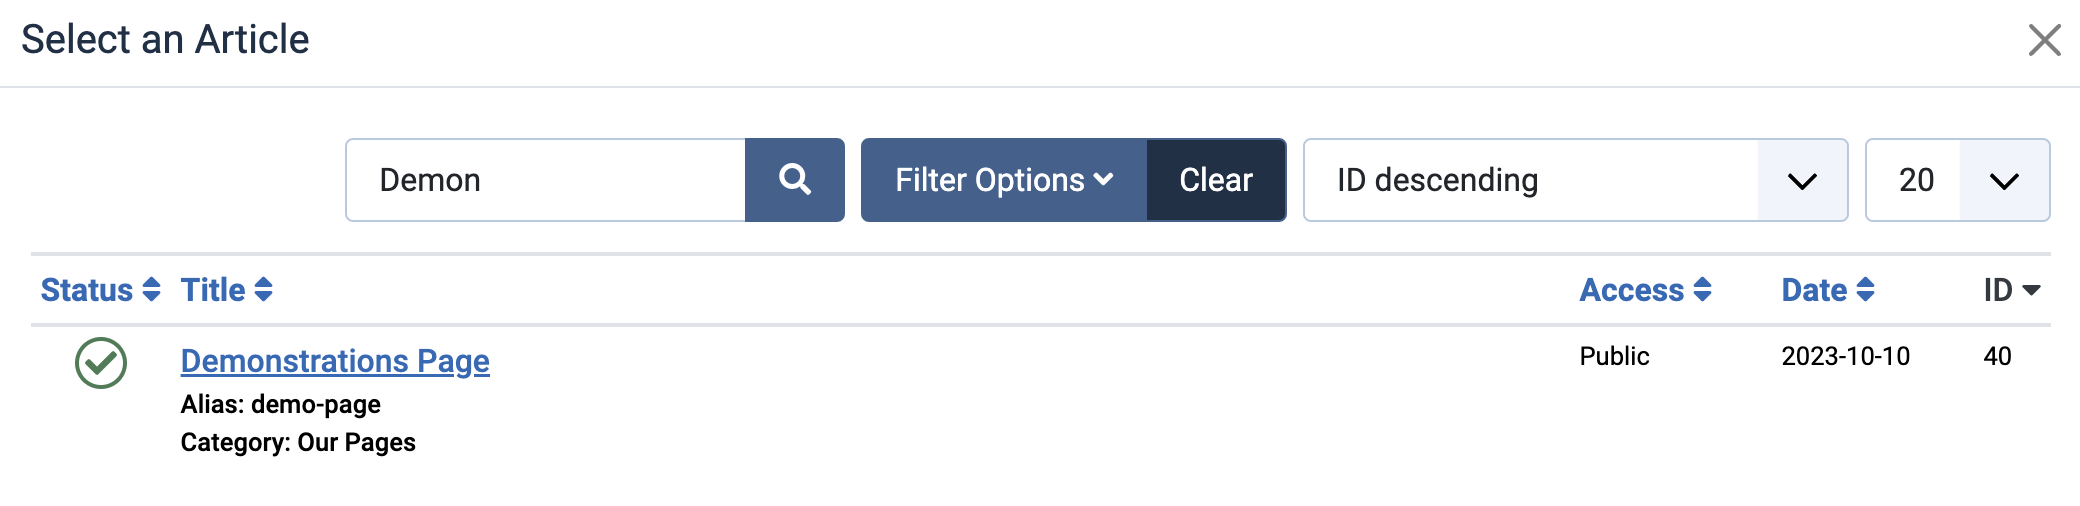
- Click the blue Select button in the Select an Article field.
- A new popup appears showing your list of all of the articles that you have created. Normally these are shown with the most recent at the top.
- Select or use the Search box to look for the name of the article that you have created. If you search for it, it will appear on its own and you can then select it.
- Now, the final stage is to set the menu item up to tell it which parent item it belongs to.
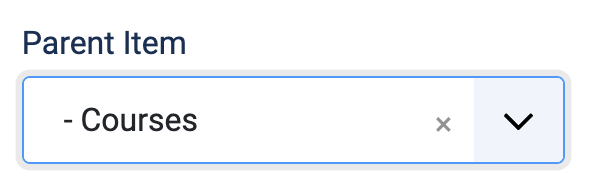
- On the right hand side of the form you will see a chooser called Parent Item. Click on this item and scroll through the list of potential parent items until you find the parent item you wish this new item to belong to. We want to show this new item under “Courses” so we choose that item:
- When you have chosen the parent item your form should look like this:
- You can now click the Save button and visit the front of your website to see if your new item has appeared.