6.4.1 Selecting text and elements
Before any item can be formatted or styled in an article it must be selected. This can be a simple action like clicking on the item, for example an image, or a double-click to select a whole word in a sentence.
6.4.2 Selecting Text
Text can be selected either by clicking and dragging to select a block of text, or by double-clicking on a specific word to select just that word. Once the text is selected it can be styled and formatted using the buttons in the editor toolbar.
6.4.3 Selecting an element
To select any element, such as an image or a table, click once on the element. Any button associated with that element, like the Insert / Edit Image or Insert Table button, will become active. The element can now be edited using the dialog opened by clicking the active button or styled by other buttons in the editor toolbar.
6.4.4 Selecting Table elements
Selecting a table, a table cell, or a table row can be done by first clicking into the table. Multiple table cells can be selected using the mouse, by clicking and dragging over the cells you want to select or holding the CTRL or SHIFT key and clicking in the cells to be selected.
6.4.5 Standard styling features
The standard styling features that you see on the top row of the toolbar will probably be familiar to you if you know Microsoft Word. These features are often used when we're editing text to make it look more appealing:
6.4.6 Toolbar First Row

6.4.7 Help
A quick route to getting help about using the editor system. Many users forget to click on this help icon and do not realise that when it is clicked, they will receive a significant number of help Pages in a pop-up window describing exactly how each of the features of the editor function can be used to make the webpage look better.
6.4.8 Find
If you need to find a word in a long article, this Find icon will help you.
6.4.9 Undo and Redo
Just like in Word, you can undo something you have 'done' using the editor panel and you can go backwards and forwards to redo.
6.4.10 Text styling
Just as in Word, you have the option to use Bold, Italics, Underline and Strikethrough. To use these, you would simply select the text in the editor, ensuring it is highlighted, and then click the appropriate button to enable that styling feature.
6.4.11 Justification
Again, as in Word, you can justify the text within the page so that it is fully justified, justified to the centre, left or right.
6.4.12 Blockquotes
This looks like a bold double quotes icon.
If you select some text inside the editor and then click on the Blockquote icon, then that text will appear in a particular way, styled to present a quotation on the website. This may present itself as being wrapped with large double quote marks or some other artefact. Often, within the editor this is simply shown as indented text but, when the page is viewed in the front end of the website, often a more interesting look and feel is visible. This option is used a lot for testimonials and quotations. If, when you set a sentence to be in Blockquote style you see no change on the front of the website, let us know so we can help you.
To switch off the special styling, select the text in question and click the bold double quotes icon.
6.4.13 Advanced Styling

Adjacent to the Blockquote icon are two drop down choosers which normally have Paragraph or Format in the display.
The first chooser is used frequently whereas the second chooser is rarely used but is provided for your website development team when applying specific look and feel to content on your behalf.
Below we focus purely on the first drop-down which normally has the word Paragraph or Format on show.
![]()
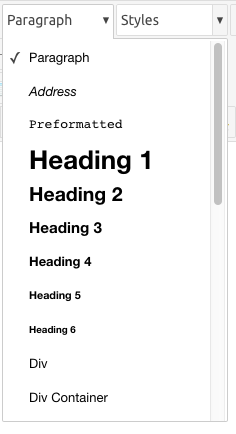
When you click on the pulldown arrow to the right of the text on this first pulldown, you will see several different options which, when selected will apply that style to any selected text. Note that some sites have fewer choices to their pulldown!
Some of our customers use many of the different choices however we often simplify these choices to make it more easy for you to choose the most suitable to your requirements.
6.4.14 Using the Styling Chooser
Let's imagine you want a heading within the article to make the text stand out from the rest of the text on the page, a little like the words "Using the Styling Chooser" above stand out (it's a heading too!)
To accomplish this, you would select the text in question in the article editor and then use the styling pulldown to choose an appropriate style.
Let's describe what these choices do in a little more detail:
6.4.15 Paragraph
MS Word Equivalent : Normal Font
“Paragraph” this is the default choice of all basic text on the page. Essentially, it will apply a specific font, size and colour to the text which has been selected to be Paragraph style. In the editor screen, you may not see a great deal of difference between text which is Paragraph and text which is not Paragraph. You will however notice the difference when you look at the same information on the front of the website. This is because when the page is built at the time of viewing it, certain style rules are applied to information which has been wrapped with a Paragraph style. The difference may be subtle but it is nevertheless important.
6.4.16 Headings
MS Word Equivalent: Heading 1, Heading 2 etc
Heading 3 - this is a well-used style. Select text which sits on a line of its own, just as a heading would, and then choose the Heading 3 style to apply to that style to the chosen line of text. The result will be that the text will become larger, often bold and may under certain circumstances, be shown in a different colour. This is because when the page is built at the time of viewing, styling is applied to the information which is defined with a Heading 3 style.
If Heading 1, 2, 3, 4, 5, 6 are accessible you can choose them but check your results in the front end to ensure they are what you expect.
6.4.17 Blockquotes
Blockquote - we saw above how this particular styling can be selected by clicking on the double quotes icon. This drop-down choice performs the same function.
6.4.18 Spans
Span - this style is used mainly by the development team when creating content on your page. We would largely not expect you to use the Span style as it has specific rules all its own!
6.4.19 Toolbar Second Row
![]()
As we have seen above, most of the text styling choices are available on the top row of the editor toolbar. The second row has additional features as follows.
6.4.20 Cut/Copy/Paste/Paste as Text
The four icons allow you to cut text from the page, copy selected text and then if needed, simply Paste it, or Paste as Plain Text elsewhere.
6.4.21 Indentation
Next you will see the ability to perform indentation to the left and to the right. This is very similar to how you might use Microsoft Word to move text in an indented way to the left or right.
6.4.22 Numbered and Bullet Points Lists
The next two icons represent the ability to have numbered and/or bullet point lists. Just like in Microsoft Word you can select paragraphs of text and apply these styles to them and the bullet points will automatically appear or, if you choose numbered lists, then the numbers will appear at the side of the paragraphs. At the same time, these numbered or unnumbered lists may be indented slightly.
6.4.23 Sub and Superscript
The next two icons allow you to have subscript or superscript text. From experience, these are rarely used.
6.4.24 Case Change
There is an icon which allows you to change the case of text. If you select a word or sentence, then you can use this icon and a drop-down will appear to choose what style of case presentation you wish to show.
6.4.25 Symbol
If you need to insert special characters such as Copyright (©), Degrees (°), and Euro (€), you can choose them from a range of characters from this button.
6.4.26 Horizontal Rule
Finally, on the second row, you'll find an icon which looks like a horizontal line. You can use this at any break between two paragraphs to insert a horizontal line to separate information.
6.4.27 Third Row Toolbar - Tables
The third row of the toolbar is primarily associated with tables management.
![]()
We cover Tables in detail on our Tables section.
6.4.29 Fourth Row Toolbar
![]()
The final row of the editor toolbar is related to how the editor looks, adding links, adding read more and page-breaks and finally inserting standalone images and random document links. The main icons to consider in day to day usage are:
6.4.30 Add / Remove Hyperlinks
A link to another website (hyperlink) may be inserted or removed in an Article using the Insert/edit link icons:
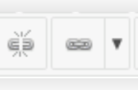 Unlink/Link
The Unlink icon removes any previously added hyperlinks when you click your cursor on such a hyperlink. No warning is given; if a link is applied to text, then the link will be removed.
The Link icon allows you to add a hyperlink. See later for a section dedicated to working with hyperlinks in your article.
6.4.31 Add Images and Media
![]()
These two icons allow you to upload an image or media file (audio or short video) that you can then insert into your article. See our section on adding images for more details.