Tasks are all about what happens when your Form is submitted by a website visitor. You may find it useful to read previous sections about convert forms to establish an understanding of how forms are set up.
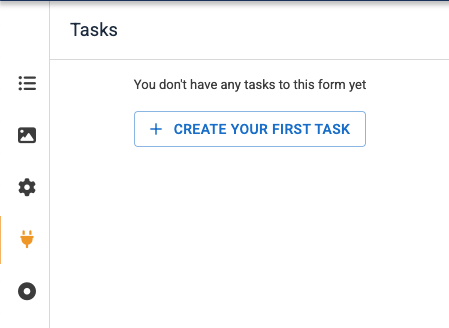
When you first create your new form, and you click on the tasks icon, you'll see the option to create a task.
The "tasks" in Convert Forms refer to the automated actions and workflows you can set up to happen when a form is submitted or an event related to the submission occurs.
Here is a concise description of what the tasks are all about:
Tasks essentially, let your form submissions do things beyond just saving the data.
Key Purpose of Tasks:
-
Automation: Automate repetitive steps, saving you time (e.g., sending a welcome email, creating a user account, sending the content of the form to an email recipient).
Core Components:
-
Trigger: The event that starts the task (e.g., A form is submitted, a submission is edited, a submission is deleted).
-
Action: The specific job the task performs (e.g., Send an email).
-
Conditions (Optional): Rules that determine if the task should run
In short, a Task is like a custom-built rule: "When [Trigger] happens, if [Conditions] are met, then perform [Action]."
Creating your first task
Click the button marked "Create your first task" and a pop-up screen will appear:
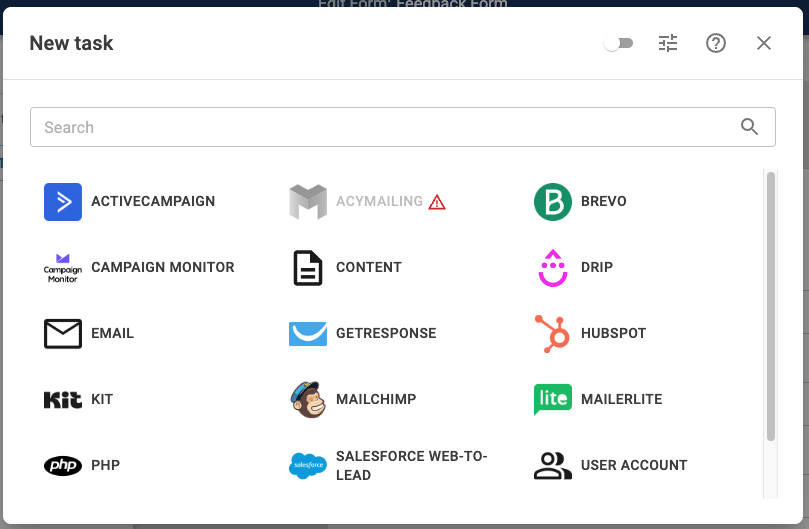
Although this pop-up screen shows many different types of task, the most commonly used is the simple email task shown in the first column. Click this icon to open a New Email Task pop-up screen.
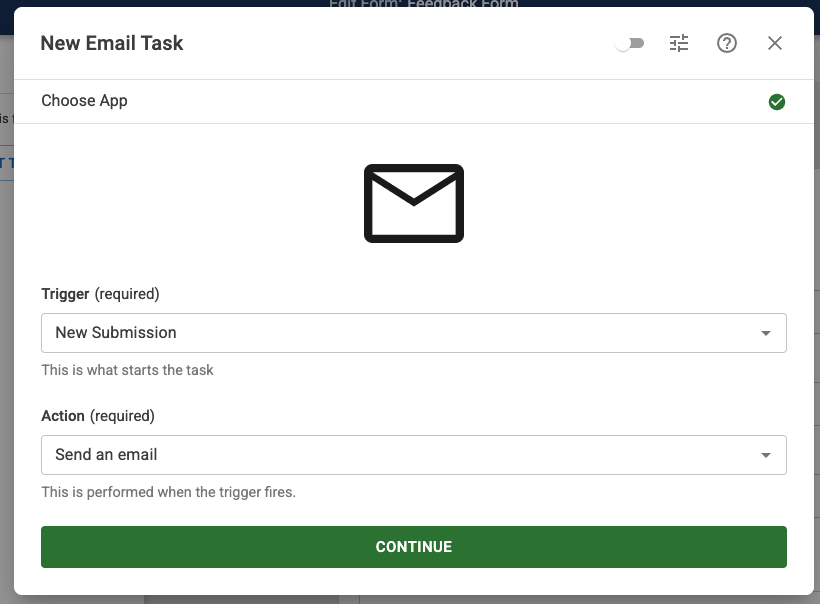
This pop-up shows that the trigger will be a new submission, in other words when somebody clicks the submit button on the form. The action will be to send an email, so we can now click the green continue button. This causes the pop-up screen to expand to provide a number of new fields that you need to configure.
The first set of fields are related to who to send the email to and who it's from.
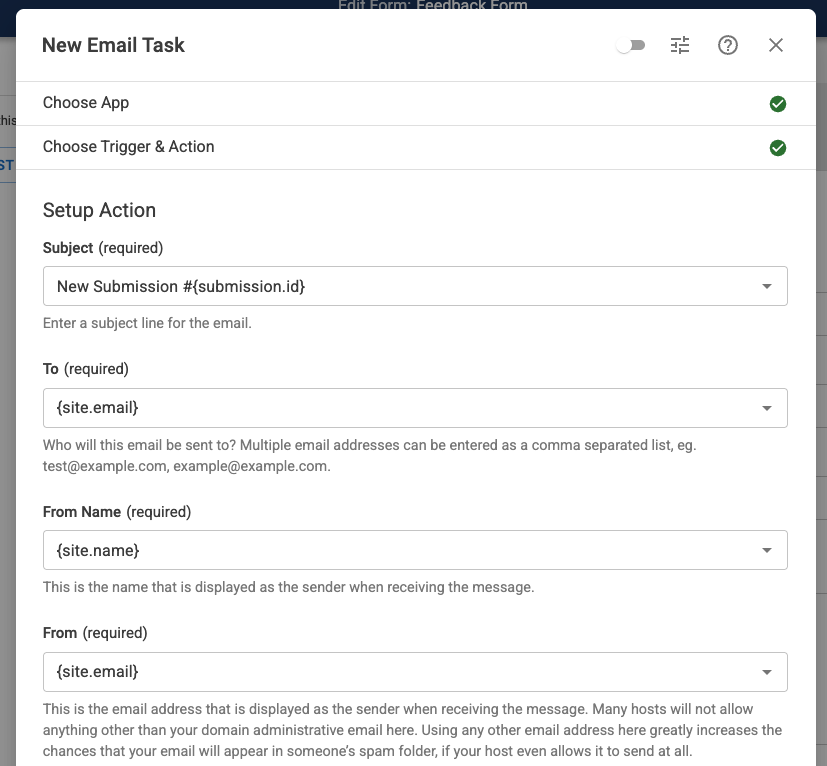
By default, preset values are applied to each of these fields. It will be important, however, to change the TO field to ensure it reaches the correct destination email address.
Click into the To (required) field and type in the email address of the email account that you want this message to be delivered to.
If you wish to send this message to different people, you can enter them as comma-separated lists such as
You should leave the From Name and From Email address as default.
The next group of fields relate to who to reply to if you wish to do so.

The reply to email field expects you to choose in the email address of the person who is submitting the form. Normally, all forms will have an email field in them and therefore you can choose that field. Click on the down arrow to the right of the field to see a list of options. Choose Email Address (n) in our case, n = 0, but in your case, n might be a different number altogether.

You can leave the reply to name field, the CC field, and the BCC field blank.
The finally at the bottom of this form is the body.

By default, you will notice that it shows {all_fields}. In other words, all fields which are in the form will be sent to the email recipient you defined above. You can tailor this if you wish to do so; however, the default is quite standard and quite acceptable.
For more information about using different tags to add to your fields and the body of your message, see here.
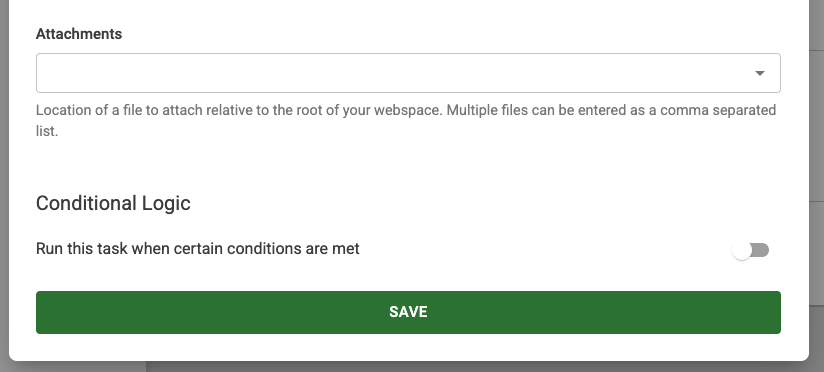
Lower down, you'll notice a field for attachments which in most cases will never be used. Finally, at the bottom you'll see a green save button. Please click this button to save your task.
Having saved your task, you'll notice that it is shown in the tasks column on the left-hand side.
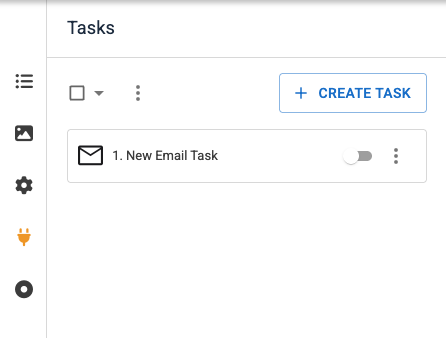
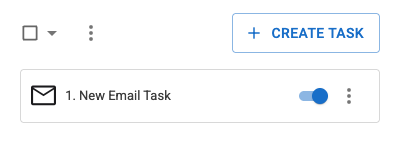
By default, the task is switched off (the toggle switch shows grey) and therefore you can click the toggle switch to make this task live and ready for use (blue).
Editing a task
Remember, a task is something which takes place when a form is submitted and from time to time you may need to edit the task. For example, if the email recipient for your form data changes, you may need to change the email address associated with that field. To make these changes, follow these steps:
- In the control panel, go to Components > Convert Forms > Forms.
- Click on the title of the form you wish to edit
- In the sidebar you will notice five icons. Click on the fourth icon which looks like a two-pin plug
![]()
- This brings you to the tasks area where you'll see all of the tasks which have been set up for your form. In general, you'll only find one task
- Click the three dots on the right of the New Email Task panel. A drop down will appear showing Edit, Rename, Duplicate or Trash.
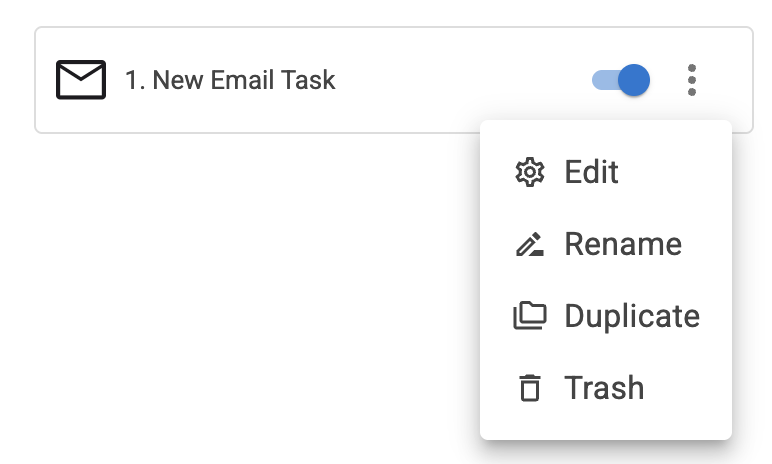
- Click on the edit option and the task settings will appear.
- Click into the appropriate field to change the settings for that field
- Head down to the save button at the bottom and your form will then use those settings for all future submissions.