class Note: there are certain settings which configure the system to not show these images. If you set up Full or Intro Images but you cannot see them, let us know and we can enable them to be shown.
Intro and Full Article Images
A webpage based on an article can have one or more images showing at the head of the article to create interest and impact.
What is an Intro Image?
An Intro Image is an optional feature and gets its name because it is only displayed as part of a Blog or Featured Article Introduction. The introduction text itself is usually the first few lines of a blog post, used to entice web visitors to read more. A Read More button is usually used to then allow the visitor to read the Full Article.
Is an Intro Image mandatory? No! You do not have to add an Intro Image at all if you don't want to!
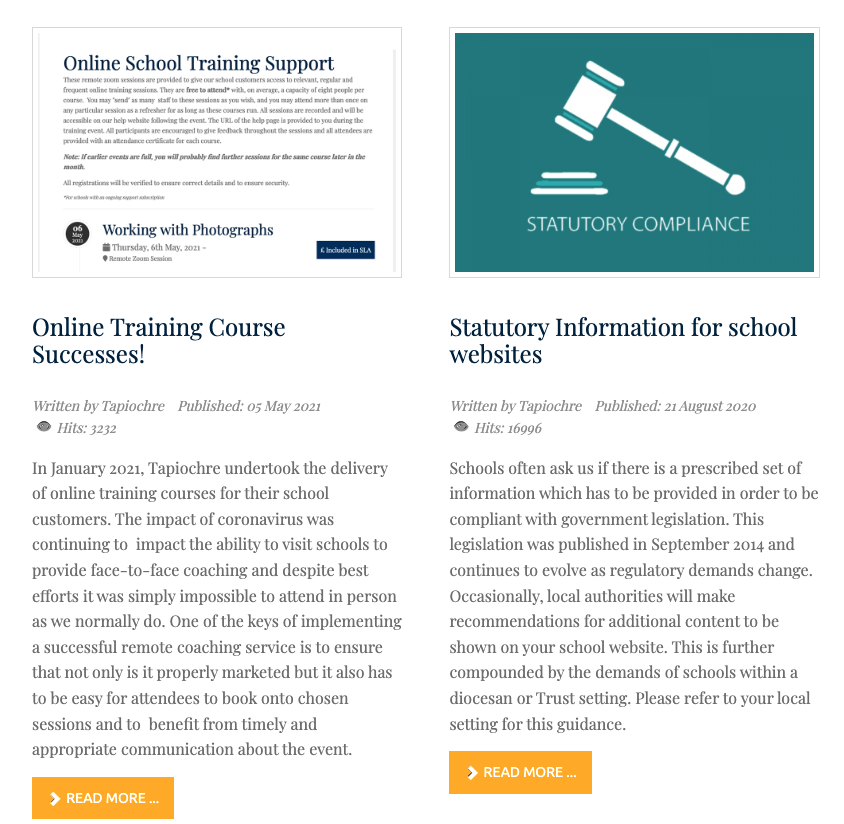
An Intro Image might look like these, taken from the Tapiochre Blog page:
So if you are writing a BLOG page, you might use the Intro Image to display a picture to help introduce the blog article.
What is a Full Article Image?
A full article image sits at the top of ANY article [not just blog or featured items]. Think of it as you might a magazine headline image. Is a Full Article Image mandatory? No! You do not have to add a Full Article Image at all if you don't want to!
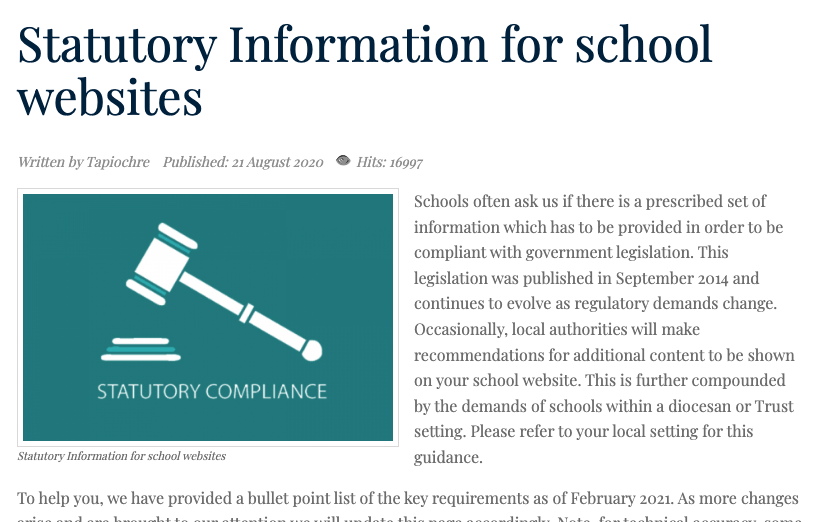
On a webpage, it will look like this:

In this example, there is an image at the top which takes up the full width of the block that contains the article text for that the page.
Other Positions for the Intro and Full Article Images
These images can be set to us a CLASS to be aligned to the left, the top or the right of the article. For example, if you set the image class or be aligned to the left, the article will look like this:
The Images and Links tab
To set up Intro and Full Article images we use the Images and Links tab in the Article Editor.
![]()
When you click the Images and Links tab, you will see a screen as shown below :
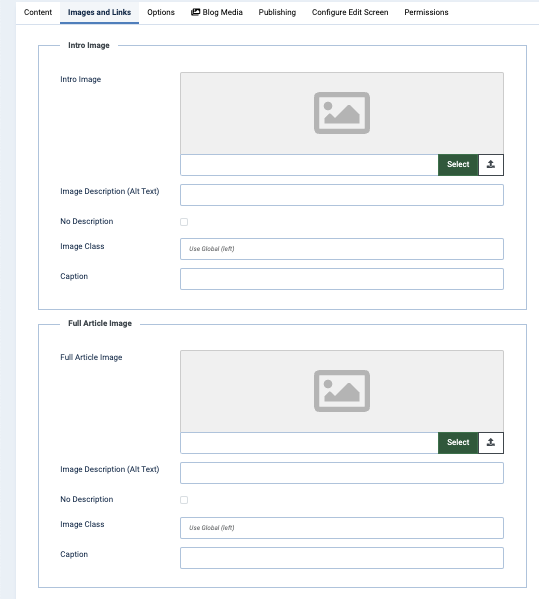
The different sections are outlined below with a description of what each looks like and how it works.
Intro and Full Article Image Settings
You will note the settings for both Intro and Full Article Images - they look identical apart from the naming of the fields so we can use the same concept for both:

Intro Image and Full Article Image Fields
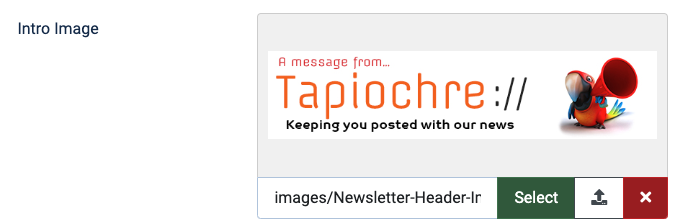
To choose the image for these fields as needed, click the associated Select button.
Once you click the Select button, you can move to (or create) a relevant folder to find or upload and store an image. If the image is already uploaded, you can navigate to it in the folders available and select it to be displayed in the Intro or Full Article Image for the article. After you have selected an image, it will appear in the Intro Image field:
You can also make it easy for yourself by copying and pasting the image link from the Intro to the Full Image field if you want the same image to be shown in both areas.
This is a common practice and works well under most circumstances.
The Image Class Field
This tables below outline the options that you can type into these fields and outcomes.
|
Image Class |
Results |
|---|---|
|
Left |
Image will be found on the left of the article and text will flow round it |
|
Right |
Image will be shown on the right of the article and text will flow round it |
|
None |
Image will be shown on the top of the article and text will flow under it. (*See also the note below) |
Other Fields
|
FIELD LABEL |
USAGE AND PURPOSE |
|---|---|
|
Image Description (Alt Text) |
Gives the image some alternative text for Search Engines to understand what the image is and to support assistive web viewing |
|
No Description |
Does nothing! Do not use. |
|
Caption |
If you enter an optional caption for the image, depending on the settings of the website, the caption will appear under the image. Note: Not all templates display captions. |
*The Visual Result of "Class: None"
If you set the Class to None, the image acts like a "block" or a heavy object in a stream.
-
Position: The image will sit on its own line.
-
Text Flow: The article text will not wrap around it. Instead, the text will start on the very next line below the image.
-
Alignment: By default, it will usually sit on the left side of the page.
What about smaller images though?
-
On Desktop: If you use Class=None, you will have a large empty white space to the right of the image. This can sometimes look a bit "broken" or unfinished.
-
On Mobile: Since most phones are about 375–425 pixels wide smaller images might look okay. ideally, though, images which are going to be in the full article image position (with a class equals none) should have a width of at least 1200 pixels
What do these choices look like when set up correctly?
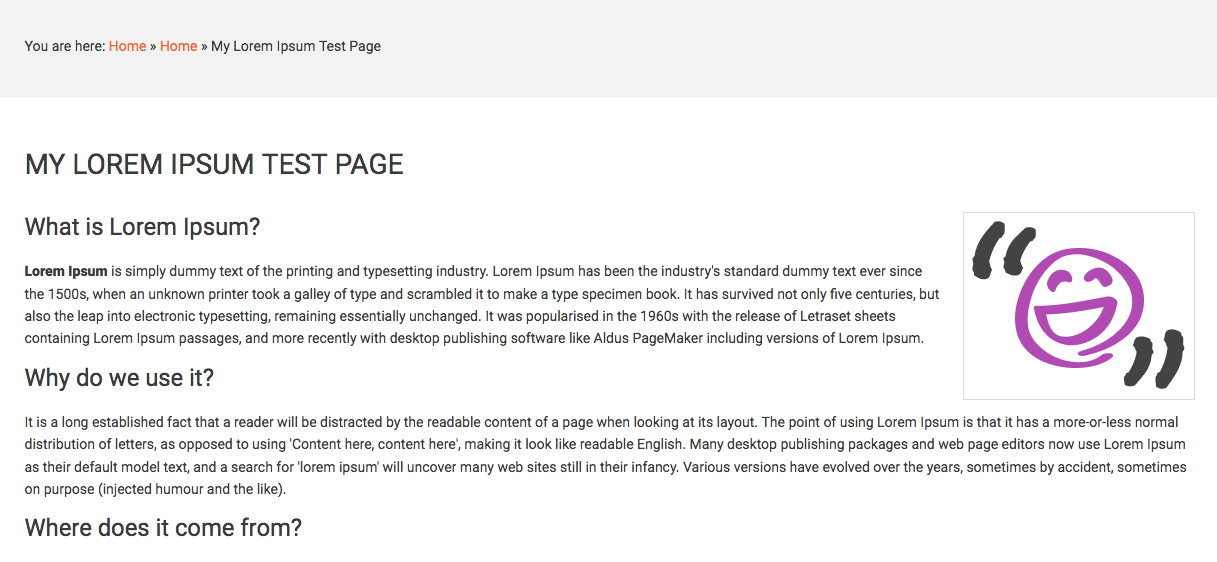
First, consider a sample page with no images but with text already added into the editor and saved. The sample is called 'My Lorem Ipsum Test Page":
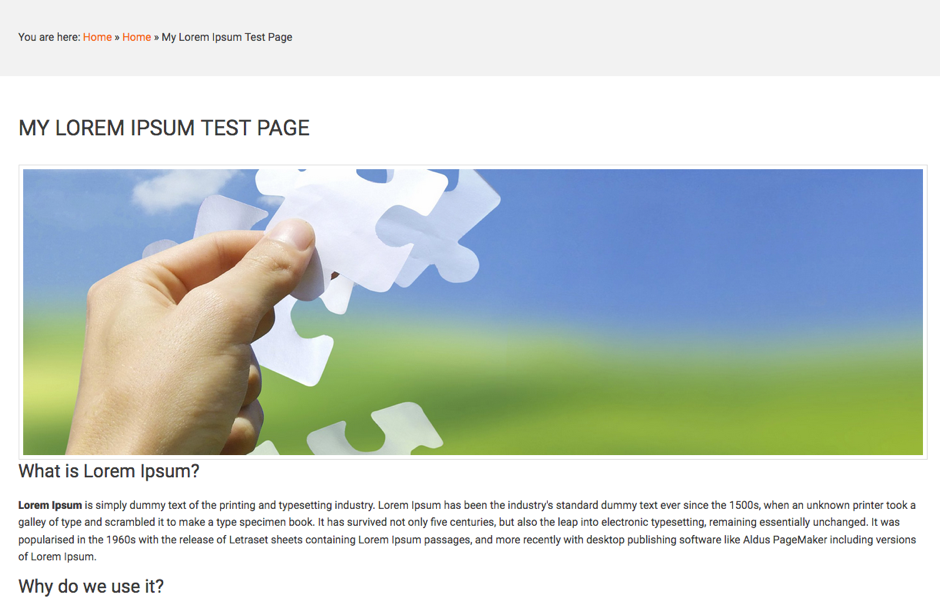
Full Article Image (Class : None)
To have a full width image at the top of an article, it needs to be wide enough. Below we see a nice wide image. Note though that it's not too tall as if it were, it would push the text of the article a lot further down the page making it less friendly!
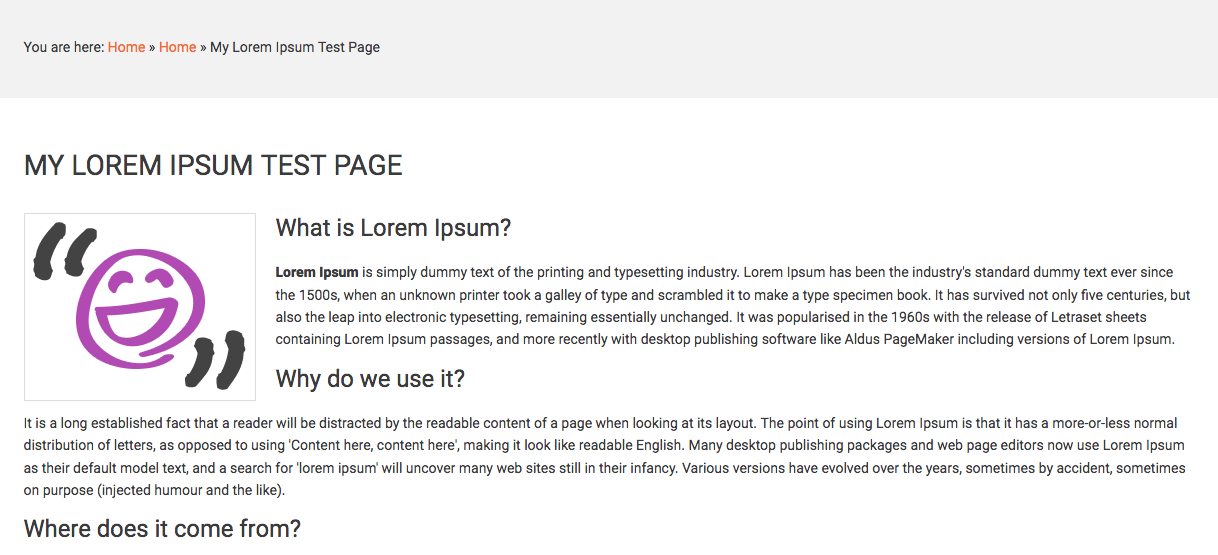
Full Article Image (Class : Left)
To have a left aligned image at the top of an article, it needs to be smaller to not push the text too far to the right. Here we see a nice small image.
Full Article Image (Class : Right)
To have a right aligned image at the top of an article, it needs to be small enough to not squeeze the text too far to the left. Here we see a nice small image.